Meet my new pet!

Last month, I was at the store (Wal-mart, no less!) and spied a rare (in my neck of the woods) and new product that I hadn’t ever seen before: GT’s Kombucha. I had heard about Kombucha a few years ago, but as with many new ideas, it seemed weird and scary to me. Fermented tea? How can I be sure I don’t grow some really bad bacteria on the tea? Oh, how little I understood about whole health! When I saw the Kombucha in Wal-mart, I knew I wanted to at least try it to see if I wanted to get in to the Kombucha business.

I popped open the top and fell in love. When my bottle was empty, I was dreaming about the Kombucha for days. I became obsessed. I scoured the internet for supplies, read the Kombucha book by Cultures for Health, and was unwrapping my pet SCOBY within a few weeks after my first taste of GT’s Kombucha.

My SCOBY really felt like a new part of our family. It was something I was going to care for and it was going to sit at the dinnertable with us. I was very enthusiastic with my first batch and started with a whole gallon. I counted down the days eagarly until my first batch would be done. I felt like a kid on Christmas Eve!

image
A healthy batch of Kombucha, but so. many. SCOBYs!

I was so pleased with the flavor of my first batch. It was so yummy and I imagined the Kombucha flowing through my body and strengthening my cells! But I soon got disheartened and frustrated. Even though my Kombucha was delicious, it lacked the pizazz of GT’s Kombucha. Every dose of Kombucha that I drank just reminded me more of how delicious the storebought Kombucha was and how inferior my Kombucha was. I half heartedly made my second batch, only a quart this time, just days before we completely packed up our house and moved.

I made sure to be a good owner and I lovingly packed my brewing Kombucha. It rode safely by my side in the van. I brought it in to the hotel room with me. I took care of it dutifully.  I get new pet SCOBYs every few days, and I sadly look at the SCOBYs piling up. It somehow communicates that I am a neglectful owner, although I am still brewing it according to instructions. The multiplication of the SCOBYs should be a happy sight; something that makes me feel that I am being successful in my brewing. However, I feel that I have SCOBYs coming out my ears and I have no place to rehome them.

After much procrastination and exasperated investigation, I decided to invest in some airtight flip-top bottles. If they work as they should and my Kombucha ends up fizzy after the second fermentation, I think I will once again be in love. If not, the alternative is not good for my newest pet.

In the meantime, if anyone wants a new pet SCOBY, I’d be happy to share! Let me know!


Transitioning to Farm Life

imageI’ve had such an extremely quiet blog, but it’s been for a good reason. In following our hearts’ desires, we have gone to extreme measures in the past 6 months in putting up our home for sale, selling our home, quitting our jobs, and moving across the country to have access to acrage for a small homestead!  I really do hope to chronical our adventures well and to share all the things I am learning.

We are currently still trasitioning in to our new home, and it will be a process over the next few months since there are things we need to fix up (and unpack!), but since it is Spring, we are planning on getting started with some fun things like:

  • Baby chicks for laying hens in the fall
  • Baby goats to get started on having milk next year and meat
  • And of course, lots of experiements going on in the kitchen, as always!

On to rolling hills and green pastures!


Milk Kefir “Sourdough” Bread

I have been researching fermentation a lot lately, and it’s one of my newest “from scratch” goals.

I came across a free ebook from Cultures for Health on Milk Kefir. I almost didn’t download it since I know how to make milk kefir, but I thought I would browse the topics and brush up on troubleshooting issues and try to become more of a kefir expert.

While I have heard of using kefir in recipes and to make cheese, I wasn’t familiar with kefir on the cellular level to realize all the things I could make with it! The book states that I can use kefir to culture items to make probiotic mayo, salad dressings, and hard and soft cheeses, among many other things, and that kefir is a culture to act as a kitchen’s one-and-only culture.

I have been wanting to catch some wild yeast and make a sourdough starter for many years, but since I don’t love sourdough, it always seemed like it would be an adventure to be had for a time when I had nothing better to do. Since I am pretty busy running around with the little ones, I haven’t had any boredom to motivate me to grow a pet-sourdough starter.

When I was reading up on milk kefir, I realized that the grains contain both bacteria and yeast, a fact that my nose knew but my brain did not realize. This milk kefir sourdough bread is simple and seems to be pretty failproof. No yeast is required since the kefir grains have yeast! I didn’t even follow the recipe and it turned out just fine.

Below is a direct copy of the recipe, found here.

Ingredients:

4 cups whole wheat or all-purpose flour
1½ teaspoons salt
2 tablespoons honey
Scant 2 cups milk kefir

Instructions:
Mix flour and salt well in a large bowl. Pour in honey and 1½ cups milk kefir; mix well. Add additional milk kefir until dough is sticky but pulls away from the sides of the bowl.
Knead 5-10 minutes or until dough is soft and smooth.
Transfer to an oiled bowl and ferment for 12-24 hours.
Punch down. Place in a loaf pan, cover, and let rise in a warm place until it reaches the top of the pan.
Preheat oven to 350°F. Bake for 45-50 minutes or until done through and golden brown. Cool completely on wire rack before slicing.

When I made the recipe, I had two preschoolers helping me, and I didn’t even successfully put in all of the ingredients. I completely and accidentally left out the honey. Also, after I got started making the dough, I realized I only had about 3/4 cup of kefir. My solution for my lack of kefir was to substitute water for the lack of kefir, and I made sure to pinch off a small kefir grain and throw it in with the dough (which I think was unnecessary). I started my kefir sourdough recipe at about 12pm on a Wednesday, I punched it down at 1pm the following day, and cooked the bread at about 5pm. The resulting bread was lip-puckeringly sour!  Since the recipe calls for allowing the bread to ferment for 12-24 hours, my bread-making process of 29 hours was way too long of fermentation for my liking. Next time I make this bread for a dinner I will start the process before bed the night before. But for any homesteader who loves sourdough, I think milk kefir sourdough bread is the way to go!

Baked oatmeal

imageFound this yummy recipe and need to keep it! I ate it with pecans and have not baked it yet. I just ate the mix, cooked in the microwave with milk!
 

Mix:

4 cups Old fashioned oats

2 2/3 cups nonfat dry milk

3/4 cup brown sugar

1/2 tablespoon salt

2 tablespoons cinnamon

2 cups raises or craisens

2 cups chopped nuts


mix above ingredients together and store in a container.

To Prepare:


when ready to make, ADD:

1 cup of oatmeal mix (see above)

1 teaspoon butter

1 cup boiling water

1/2 cup chopped Apple

bake 350F for 30-35 minutes. Makes 2 servings.

On Turning 30

Today I crossed in to another decade. I know many women might feel depressed about the big 3-0, but I feel pretty content.

A few years ago, one of my friends was getting ready to turn 30. I remember thinking it was unfortunate that she was going to hit a new decade. “I’m going to be 30,” sounded so old. She also shared that on her previous birthday she had made a list of a bunch of goals that she had for herself before she turned 30. I remember thinking how cool and inspirational that was, and how I hoped to do something similar.

Well, several years have passed, and I have no list of goals that I am reviewing. Last night, my husband asked me if I accomplished all that I had wanted to accomplish in my 20’s. I think I have, but I also feel like I achieved more than I wanted.

My main goals upon entering my 20’s were to graduate college and get married. That’s pretty much it. However, in my 20’s, not only did I graduate college, but I got my Master’s Degree by age 24. That definitely wasn’t in my plan, but it just got thrown at me, and I said, “well, why not?”

I didn’t have the goal to travel to XYZ places this decade, but I made it to Mexico, Central America, Africa, & Europe (& DISNEYLAND on two continents!).

I didn’t have a goal to get a stable job, so I’ve had the incredible experience of saying that I’ve taught everything from ESL, Biology, Chemistry, Math, Dance, & Spanish.

I knew that I wanted to have kids, but I don’t know if I made it an official goal. It was always just, “this is the best time to get pregnant, so let’s do it!” Now I will have 3 kids at the age of 30.

I’ve spent a lot of time in the past few years sitting on the couch, making hundreds of breakfasts, PBJ’s, changing thousands of poopy diapers, calming tantrums, reading books out loud, doing dishes & laundry. Were those on my goal list entering my 20’s? Yesterday I thought, “I am SO glad Emmanuel pooped 4 times today. If he hadn’t, I would have missed my 2,000th poopy diaper goal before turning 30.” True story about the number of poopy diapers yesterday, and a hyperbole for the poopy diaper goal.

Today I did a few loads of laundry and showered, but intentionally neglected the kitchen (it is my birthday after all). If you can’t find joy in these mundane things, what is life for?

I had a goal of becoming a doula starting last summer, but over 18 months ago, I was literally gifted with ownership of a school. Yes, it seems impressive to say that I am the director of a school, but, even though starting up an immersion kindergarten was in my nebulous future plans, I feel like I cheated somehow in this goal. I’m so glad I have had this opportunity to own a small business, but that definitely wasn’t on my radar when I entered my 20’s.

Other reasons I feel absolutely fabulous entering my 30’s are due to me being pregnant. A 30 year old woman might feel a dread upon recalling that she is not as fit and trim as when turning 20. But, once again, I am cheating here. First of all, I feel greatest about my body when I am pregnant. I feel more feminine and beautiful when pregnant than when not pregnant. And at 6.5 months pregnant, I am approaching that peak of pregnancy beauty. How could I not love that?

And other complaints about a 30 year old body?

“I’m a little chubbier than I used to be!” a fellow female might lament.

Well, I’m pregnant! I am celebrating the fact that I gained 14lbs since July.

“I’m not as energetic and fit as before,” says another.

Once again, I have the most beautiful excuse. I’m PREGNANT!

In conclusion, I am feeling thirty, and flirty, and fine! Many thanks to my pregnancy for letting me off the hook on some of the depressing issues about a new decade. However, I feel that I might need some extra moral support on my 31st birthday, so please celebrate me with gusto next year.

Raw Veggie Tortilla Soup

Today I was at Costco, literally wandering the aisles aimlessly and stumbled upon not just a tasting booth, but a demonstration and tasting booth. The product was for some sort of blender (I think it is the Vitamix), and the girl doing the demonstration quickly made several smoothies and a batch of tortilla soup right before my eyes. It was amazing. What is more, she did it with all raw ingredients. For the soup, the blender heated up the soup automatically. It was a yummy, healthy, and extremely easy meal literally in a few minutes. In addition, the cleanup was a breeze. I thought only in a dream could I make and clean up a delicious meal in 5 minutes. I almost spent the $350, but I knew better than to buy something impulsively, so I decided I would think about it and put it on my Christmas list.

Even though my only purpose for entering Costco was to prepay for my gas, I couldn’t help but amble through the aisles. I just started meal planning last night and, even though I didn’t have time to make a grocery list, I tried to remember some ingredients I might need. By the time I arrived home, my mouth was watering for the Caanan-sized economical organic and amazing food I had found at Costco. I decided to do an experiement and see if I could make and easy and somewhat raw tortilla soup using my old, decrepit blender. The result was wonderful. It was a little messier than cooking with the fancy blender from Costco, but it was still a relatively quick meal.

Ingredients

  1. 1 gallon of quality chicken broth (I use Better Than Boullion)
  2. 6 handfuls of baby carrots
  3. 1/2 of a small onion
  4. Approximately 10 of those small sweet peppers, assorted yellow, orange, and red, stems on (you can also substitute regular larger bell peppers). No need to take the stem off!
  5. 3 Large sticks of celery
  6. 6 garlic cloves, with the paper-y skin on! I learned that it contains health benefits!*
  7. 5 Roma tomatoes
  8. 1 More Roma tomato
  9. 3-4 large handfuls of Spinach (I actually used a Spring Mix)
  10. Tortilla chips

Instructions

Boil carrots and onion in chicken broth until tender (approximately 25 minutes). Place the carrots and onion and some of the broth in a blender and puree. Dump this in to a different pot. Puree ingredients 4-7 (RAW!) in batches, using the remaining chicken broth to aid in the puree process. Dump each batch in to the pot with the pureed carrots/onion. Once finished pureeing ingredients 4-7, place ingredients 8-9 in the blender with some chicken broth (might have to do in batches) and use the “salsa” or “chop” setting. Dump contents with other pureed food.

And there is the base of the Raw Veggie Tortilla soup! I froze half of the soup. The last step is to place a quantity of the prepared soup base back in to the blender, throw in several handfuls of tortilla chips, and blend on a VERY low setting for just a few seconds (just enough to break up the chips.

Serve immediately!

I did not put tortilla chips in my frozen soup. When I am ready to use it, I will thaw it out, heat up the soup (not cook, just heat!), and then use the blender to integrate the tortilla chips just before serving.

It is soooooooooooo delicious and so many amazing raw veggies right there! If you have a better blender than I do, you might be able to throw the carrots (and onion) directly in the blender with hot chicken broth.

This is great served with tortilla chips crushed on top, as well. I’m sure it would be yummy topped with avocado, sour cream, and/or beans. I never knew eating whole foods (literally!) could be so easy and delicious! I am excited to try more blender cooking in the future!

*This article also supports what I just learned today during the super blender demonstration. Peels and skins of food contain lots of cancer fighting compounds! However, I would probably make sure your fruits and veggies come from a good source and possibly consider organic, since I am guessing certain peels and skins contain excess pesticides.

20131101-201536.jpg

Little Miss Muffet

Little Miss Muffet
Sat on a tuffet
Eating her curds and whey…

When I was young and recited this nursery rhyme, I thought that curds and whey sounded pretty disgusting. It always made me think of curdled milk. As I got older, I realized that curds and whey was probably something like cottage cheese.

Earlier this week I received my cheese making supplies, and I have been waiting for an opportunity for days to experience homemade cheese bliss.

After reading and re-reading my cheese recipe all week, I finally decided that I had sufficient time to do my cheese experiment today.

I planned to make mozzarella cheese. The process I found here
seemed pretty easy. I also initially decided on mozzarella cheese because 1. I love mozzarella cheese and 2. From everything I read, it is one of the most basic cheeses with the least amount of fancy equipment required.

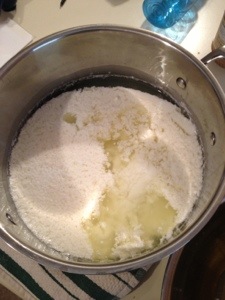
Turning milk into a new product is always a little scary. I was pretty excited when my milk started looking like this:

20131011-155239.jpg

What you are looking at is a vat of curds and whey! Yum-o! Whether Little Miss Muffet ate that or cottage cheese, I’m not really sure, but I will find a solid answer at some point along my journey.

After successfully separating my curds from the whey, the experience went downhill from there. The instruction refer to draining the curds, but puts emphasis on not draining them too much. I think I erred on the other end, as my product at each step did not resemble the hypothetical product in the instructions. Nevertheless, I pressed on with my cheese-making, assuming that I would have some edible product at the end.

I formed very gooey and grainy mozzarella balls, which I don’t think resemble what I know to be mozzarella. I haven’t sampled them yet either but plan to this evening after they chill. Hopefully they turn out edible at least in a quesadilla. I feel, however, that all I ended up making were salted curds. Verdict to come soon.

20131011-160643.jpg

Fried dough

I have been extremely busy and exhausted, and I am happy if I can get together something edible for the family every day without spending a fortune.  I haven’t been doing much on the homestead, except for holding it together.

My homesteading goals have taken a back seat, unfortunately.  Last night I made homemade french fries (not the healthiest, I know, but if we are going to eat french fries, they might as well be homemade, right?).  French fries are pretty easy to make, but I am not a frying expert.  I didn’t even know things could be fried at home until I was living in Mexico.  Street vendors would set up a wobbly table on the street in a neighborhood I lived in and people could order fresh french fries, fried hot dogs (another completely foreign concept to me), and in some places, hot and fresh churros.  The fries and hot dogs could then be smothered with ketchup, mustard, and (the best part) hot sauce.  My husband and I would grab some fried food as a treat on a Friday night a few times each year.

After frying the french fries last night, I kept thinking how I didn’t want to just throw away all that oil.  I remembered in the back of my mind that I had seen some homemade doughnut recipes that seemed pretty easy.  So I started looking for recipes.  The first I found was very complicated and involved lots of rising dough and overnight refrigeration.  Since it was already late at night, I did not want to begin that endevour, especially on something as unhealthy as doughnuts, no matter how delicious they turned out.

I found a recipe for doughnut holes that seemed very fast and easy, and the reviews were great.  I went to bed content that I could make a yummy treat to go along with our breakfast in the morning, and that it would be easy!

I discovered in the morning that it was, indeed, quite easy.

A pitfall I encountered was that the recipe called for a fry thermometer.  I figured, I didn’t use a fry thermometer for my fries, so I’m sure I can get by without one with these!  The result was that my first batch of doughnut holes turned out looking like chunks of charcoal.  Seriously.  They were these perfect black circles that looked identical to charcoal.

The next few batches turned out a nice bronze, but as I was sampling the doughnut holes, I discovered I did not like them.  They tasted like fried dough.  And oil.  For some reason, it was a big surprise.  I didn’t even finish frying them.  I don’t really like vegetable oil.  Why was I doing this to myself?!

I slowly proceeded to dump my cooked doughnut holes, charcoal pieces, and uncooked dough in the trash, and vowed to never make a doughnut again.

On the bright side, I just placed an order for some cheese making ingredients, which I have been dying to make for months (I got the ingredients from this company here).  I love cheese.  We consume pounds and pounds of cheese each month.  If I can figure out how to successfully and easily make cheese, I feel like I will be able to survive in a world of chaos, Armageddon, or at least government shutdown.  I think cheese-making will be on my timeline in about 2 weeks.  I can’t wait!

Bread of Life

I battle with viewing bread as an evil or a basic staple in life.  So many of my friends have eliminated gluten from their diet that I feel like I am committing a bodily crime by eating wheat.  However, they physically cannot tolerate gluten, while I can, so I have to tell myself that it isn’t evil for me.

Today I decided that bread is just fine to have in my diet.  If Jesus called himself the Bread of Life, then bread must be important and okay (and wonderful) to include in my diet.  This decision might change, as I haven’t done very much research on bread (for example, ancient breads might have been more healthy than commercial breads/flour today).

I have made many sweet breads in my life, but my first time making bread bread was about a year ago.  I found a good recipe for beginners and it is in my recipe library.  It is called Lazy Woman Bread.  I’ve made this bread many times in the past year.  It involves mixing with a spoon, and allowing to rise, and baking.  It is pretty simple.  While the bread has a great flavor, the texture never was my favorite, but for someone who was helpless when it came to bread (and I didn’t have any fancy equipment like a dough hook), I didn’t have much choice.

A few months ago, after buying several loaves of French and Italian bread for $1.65ish each, I was determined to make my own French loaf.  My recipe that I have for French bread isn’t hard, and I’ve gotten pretty good at it, but it is a long process and messy.  Basically, it involves kneading the dough 25 minutes, letting it rise an hour, turning it out, covering and letting rise 10 minutes, then rolling out, then making it in to the loaf, then letting rise again for 45 minutes, then baking 20 minutes, then removing, then baking 20 more minutes.  I just tried to find the online recipe to link to and found this recipe instead, which actually seems easier than my recipe.  The loaves look a bit more artisan than my loaves, but they look pretty delicious.  I might try this recipe in the future.

Last week I really wanted a delicious bread that was easy and quick.  I didn’t want the flavor and texture of Lazy Woman Bread, and I didn’t have time to make my French loaves.  I found a simple bread recipe in the book Make the Bread, Buy the Butter that is going to be my new go-to recipe!  I will let you check the book out.  Basically, you mix the ingredients together and let the dough rise for 2 hours, then bake it!  The only negative to the recipe is I can’t make it on too much of a whim, but it doesn’t require too much planning and is amazing!

Homemade Starter Yogurt Culture

Yesterday, to help me feel like I was getting back to normalcy from not having a refrigerator, I picked up some plain yogurt at the market and made a batch of homemade yogurt.  The experience went without a hitch, but as I was stirring my milk, I contemplated how annoyed I was that I had to buy yogurt to make yogurt.  While homemade yogurt is extremely easy and cheap, if I have to keep buying a quart of plain yogurt for $2-something, I think my homemade yogurt might actually be somewhat expensive if I waste the supermarket yogurt (like I did last week with a non working fridge.  My yogurt starter for one batch of yogurt ended up costing me $2.50).

Obviously the main ingredient in yogurt are live bacterial cultures.  I started wondering how I could grow these cultures safely at my house to make my homemade starter.  With a little bit of research, I discovered there is a book called Wild Fermentation that discusses a hundred fermented foods and beverages.  It is definitely going on my to-read list!

Upon a bit more research, I found that I can (possibly?) make my own yogurt starter using

Tamarind pods - they are not very good in my opinion, but it is a common flavor for drinks, candies, and Popsicle in Mexico
Tamarind pods – they are not very good in my opinion, but it is a common flavor for drinks, candies, and Popsicle in Mexico

chile peppers and/or tamarind (I only know what a tamarind is because they were all over Mexico when I lived there!  I never liked the flavor, but I would happily use it to make yogurt!).  Here is information on an experiment using the Chile peppers to make a culture.  I guess this is very common in India as well.  Lastly, I also discovered ant eggs are used to make starter yogurt cultures.  Yuck.  I will stick to the chile peppers.  Maybe I can use my painfully spicy New Mexican Hatch Chiles for this!